Ever since I started eating healthy and hitting the gym, my mind has been overly preoccupied with food. And even in my sleep, all I see is food, just like this one recurring dream I have of me binging on Japanese fare like sushi, katsudon, or yakitori. 😀 I always wake up disoriented, salivating, and craving for anything Japanese. This torture has to stop! And I have always believed that the only way to get rid of temptation is to yield to it. Needless to say, I gave in. So one afternoon, I decided to prepare Japanese Chicken Yakitori for dinner.

I used to have an obsessive addiction with Tokyo Tokyo’s Chicken Yakitori, until they decided to take it off their menu and replace it with Chicken Karaage, which I did NOT find hard to love as well. But it was truly overwhelming when I came across my long lost love, the Chicken Yakitori, once again at my previous work. They had a mean recipe for yakitori, so I made sure I learn it any way I could. So with that recipe at hand, I charged at our kitchen, only to be disappointed to find out that we’re missing most of the ingredients I need. But like any good chef, one must learn how to improvise and be resourceful.
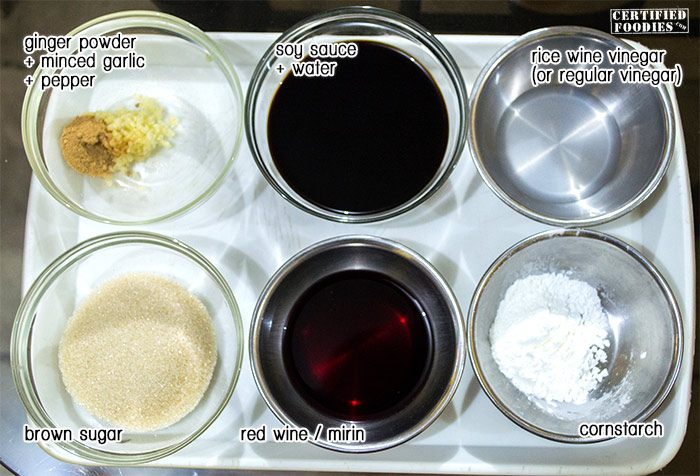
The original recipe calls for mirin (Japanese rice wine) and rice wine vinegar. I boldly substituted the mirin with red wine, and the rice wine vinegar with the regular distilled vinegar. But I suggest that if you plan to substitute the mirin, use white wine instead, since it’s milder and sweeter.
Japanese Chicken Yakitori Recipe
INGREDIENTS:
- 5 – 6 pieces boneless chicken breast / 6 – 8 pieces boneless chicken thighs

- 2 pieces garlic cloves, minced
- 1 tablespoon ginger, minced / 1 teaspoon ginger powder
- 1/3 cup soy sauce
- 1 teaspoon ground black pepper
- 1/3 cup water
- 3 tablespoons red wine / Mirin (Japanese Rice Wine)
- 1/4 cup + 2 tablespoons brown sugar
- 1 tablespoon distilled vinegar / rice wine vinegar
- 1 tablespoons cornstarch
- 6-7 pieces wooden skewers

How to Cook Chicken Yakitori
1. Soak the wooden skewers in water for 10-20 minutes. This will prevent the skewers from burning once we introduced them to heat by grilling or broiling.

2. Make the Yakitori sauce and marinade. In a large bowl, combine the soy sauce, water, red wine, brown sugar, and distilled vinegar. Stir well until all sugar granules are dissolved. Do not add the cornstarch yet, since we will be using this as our basting sauce and marinade.

3. Prepare the chicken for marination. Trim the chicken by removing excess fats, cartilages, and connective tissues. We got our chicken from the local market, so it still had a few cartilages and bones intact. I remove those since they’re really annoying. Like when you’re in the middle of enjoying your barbecue, you chew on a bone and you had to spit it out. I hate that, don’t you? 😀
4. Using the back of your knife, pound the whole surface of the chicken lightly. This is a really important step, since it will result to a tender and moist chicken, and will promote a faster absorption of the marinade.

5. Cut chicken into 2-inch pieces. This will make for faster marinade absorption and easier threading of the chicken on the wooden skewers.

6. Transfer chicken pieces into a large bowl. Add the ground black pepper, minced garlic, and ginger powder or minced ginger. Mix until seasoning is well distributed. Japanese people really love ginger. I learned to love it too, for it provides a subtle aroma and spiciness that makes Japanese food simply irresistible.

7. Add 1/4 cup of the Yakitori sauce into the chicken pieces. Then mix thoroughly, and marinate for a minimum of 10 minutes or longer. This is the reason why we’re holding off on adding the cornstarch into our sauce earlier; we’re going to use some of it as our marinade.

8. Finish the Yakitori sauce. Transfer the sauce into a small pot, and let it boil at medium heat. Make sure you don’t burn it, or else it will result to an undesirable bitter note on the sauce.

9. Prepare the cornstarch mixture. Add 2 tablespoons of the sauce into the 1 tablespoon of cornstarch. Mix well until the cornstarch is completely dissolved. Authentic Japanese Yakitori doesn’t make use of cornstarch. Instead, they reduce the soy sauce mixture until it thickens. Since it’s going to take a lot of time, we settled with the use of cornstarch as our thickening agent.

10. Throw in the cornstarch mixture into the Yakitori sauce in the pot. Continue stirring until the sauce thickens. Set aside to cool.

Still at medium heat, continue stirring until the sauce thickens. Make sure to scrape all sides to prevent the sauce from burning.
11. Prepare the Chicken kebabs. Take a wooden skewer and thread the pieces of chicken. Make sure to leave a space at the dull end of the skewer as a handle.
When threading the chicken pieces on the wooden skewer, alternately push the skewer on top then on the bottom part of the chicken, forming a zigzag pattern. This will prevent the chicken from dangling off the stick.

12. Using a brush, coat the kebabs with Yakitori sauce. Grill or broil for 4 minutes on each side. Do NOT overcook the chicken.

We don’t have a grill, so I used our turbo broiler instead. I’ve set the temperature to 350 degrees Fahrenheit and cooked the chicken for a total of 8 minutes, or 4 minutes on each side. Make sure not to overcook the chicken or you’ll end up with a dry and rubbery meat.

13. Brush additional sauce once in a while until kebabs are fully cooked.

When you see that the chicken are drying up, baste them with more Yakitori sauce until they are cooked. Once they’re done, take them out of the broiler or from the grill and transfer them onto a plate.
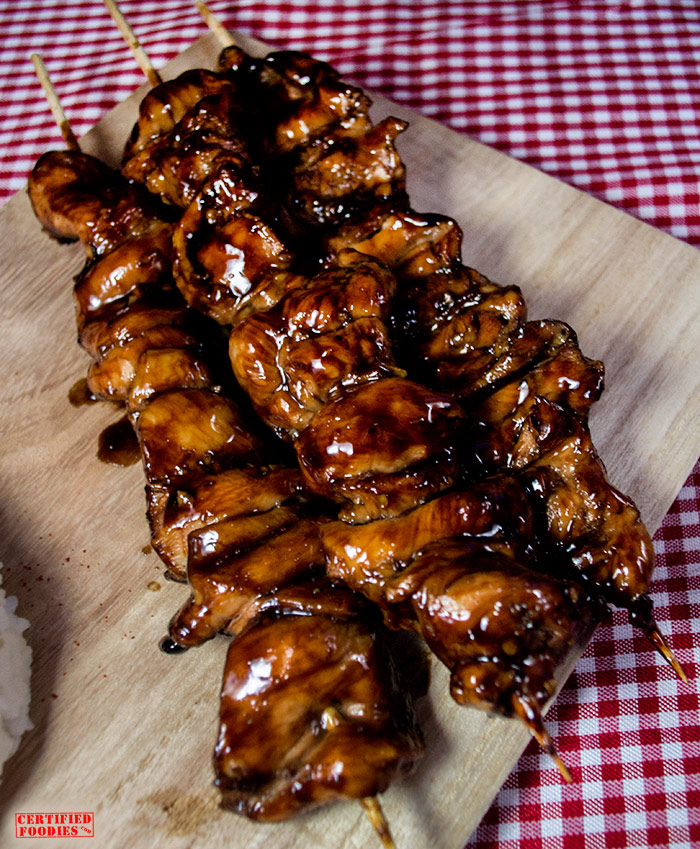
14. Best served with a cup of rice and some pickled vegetables. Enjoy!

Before serving, brush the kebabs one last time with a generous amount of our Yakitori sauce. Plate it however you like, but our Japanese Chicken Yakitori best enjoyed with a warm cup of steamed rice and a small dollop of pickled vegetables. Yum!

So there you have it – our recipe for Japanese Chicken Yakitori. It’s really quick and easy to make, a perfect dish to wow everyone at your next family gathering.
Expect more recipes coming your way, since I’m leagues away from fully satisfying my Japanese food cravings. Next time I’m making yet another one of my favorite Japanese fare – Pork Katsudon! Stay tuned!

My sister couldn’t stop herself from taking a bite off the Yakitori while she was taking this photo. 😀
That looks so delicious!!
It’s really good!! I couldn’t even resist while taking photos ’cause of the aroma. :))
Is there any substitute for red wine? I’m in a country where wine is prohibited.. I would love to try this though.
Hi, Arnold. Not even Mirin or Japanese rice wine?
Hi, Arnold. The original recipe calls for Mirin or Japanese Rice Wine. You can buy that in most supermarkets at the international aisle. If that’s not available, you can always opt that out from the recipe and it would still taste awesome!
I am definitely making this soon. 🙂 I am officially a fan of you guys now. 🙂 kudos! can’t wait for more recipes. 🙂
looks good!
Tasty and… easy 🙂 Thanks.
Thanks, Larissa. 🙂
You forgot to put the measurement for the brown sugar in the ingredients list.